Showing posts with label Nursery. Show all posts

Wednesday, January 16, 2013

More home-y stuff!

I did something that I think was creative and cheap! First off, I found this big ole close pin at Hobby Lobby. Originally, it was $17.99, however it was broken in half and the only one left in the color I wanted. So, cheap, bargain-hunter me was not afraid to ask for a discount! I got it 66% off (heck yeah!) and it ended up costing me a whopping $8! You read me right! On top of my laundry shelf it went! I've had an empty Jamestown planter from Southern Living at Home (now Willow House?) on the shelf too, for weeks now. I knew it needed a little sumthin' sumthin' and it came to me! More close-pins but painted in my pretty collection of paints I already had. It only took me forever, but I painted them all! Some colors I mixed to create my own "Signatuh Coluh" (say in the Steel Magnolia accent). And it turned out super cute if I do say so myself!
Me painting, and painting and some more painting!
See? I mixed my colors
I'm getting somewhere...
Shelf before
Shelf after! Look at that color, and it was only $8!!

Another thing I made by hand that I am not "in love" with and is currently in a closet as I mull it over about if I should keep it or trash it is this thingy....

I spray painted it gold first, then I taped it off and then painted it a Navy color i mixed up.
Next, I painted our monogram and the year we got married.
I really think it looks cheesy, but I might hold on to it. One day, it could be special HAHA! It was my very 1st hand in a "painting" on canvas. I have made a super special canvas for my son's nursery, but with a Cricut machine. I will keep it forever! Zane stares at it still when I change his "diapie" as I call it. He was even so kind to pick off all the buttons. No worries mommy's, I snatched them up super quick and repaired my precious painting. Check it out here!! It's so unique and cute!

What do ya think? Trash em or treasure em??

Tuesday, May 10, 2011

Nursery Reveal!!

The long awaited nursery is finished...for now!  It turned out just as I hoped and so relieved it is done!!  We have 3 weeks left (...and counting) for Mr. Zane to make his grand debut!!  Hope you all like his nursery as much as we do!


To add some special touches to the nursery I went to the future grandparents (on my side)...My dad is pretty gifted when it comes to wood-working, (it is his livelihood) you may remember my blog post about the gorgeous mantle he built.  But check out the fabulous bookshelf he built for his very first grandson...

And...
I always pictured my dad building this for me one day, and he made my dream come true! (YES! He actually built this!)  It glides too!


You may be wondering where I got the stunning cradle bedding...well in comes my mother, the Grammie to be, she made it, all by hand!  She is a very talented seamstress!

Not only did she make the cradle bedding, she made this diaper stacker:


And these changing pad covers:


I feel very blessed to have parents that can create these beautiful things for Zane and I to cherish forever! 

Everything is ready and waiting and we couldn't be more excited and ANXIOUS for our handsome little man to arrive!!

Wednesday, March 23, 2011

Nursery D.I.Y. - Wall Art

Well, I have searched high and low for the perfect "quirky" piece of art to go on the big, bare wall which Zane's changing table sets up against.  Not an easy task when I am an extremely picky pregnant person and also a bargain shopper!  I had many requirements to which this piece of art must meet!  First, it had to be big enough to hold its own on this wall!  Second, it had to go with my theme and colors and most importantly it needed to be within my budget! 

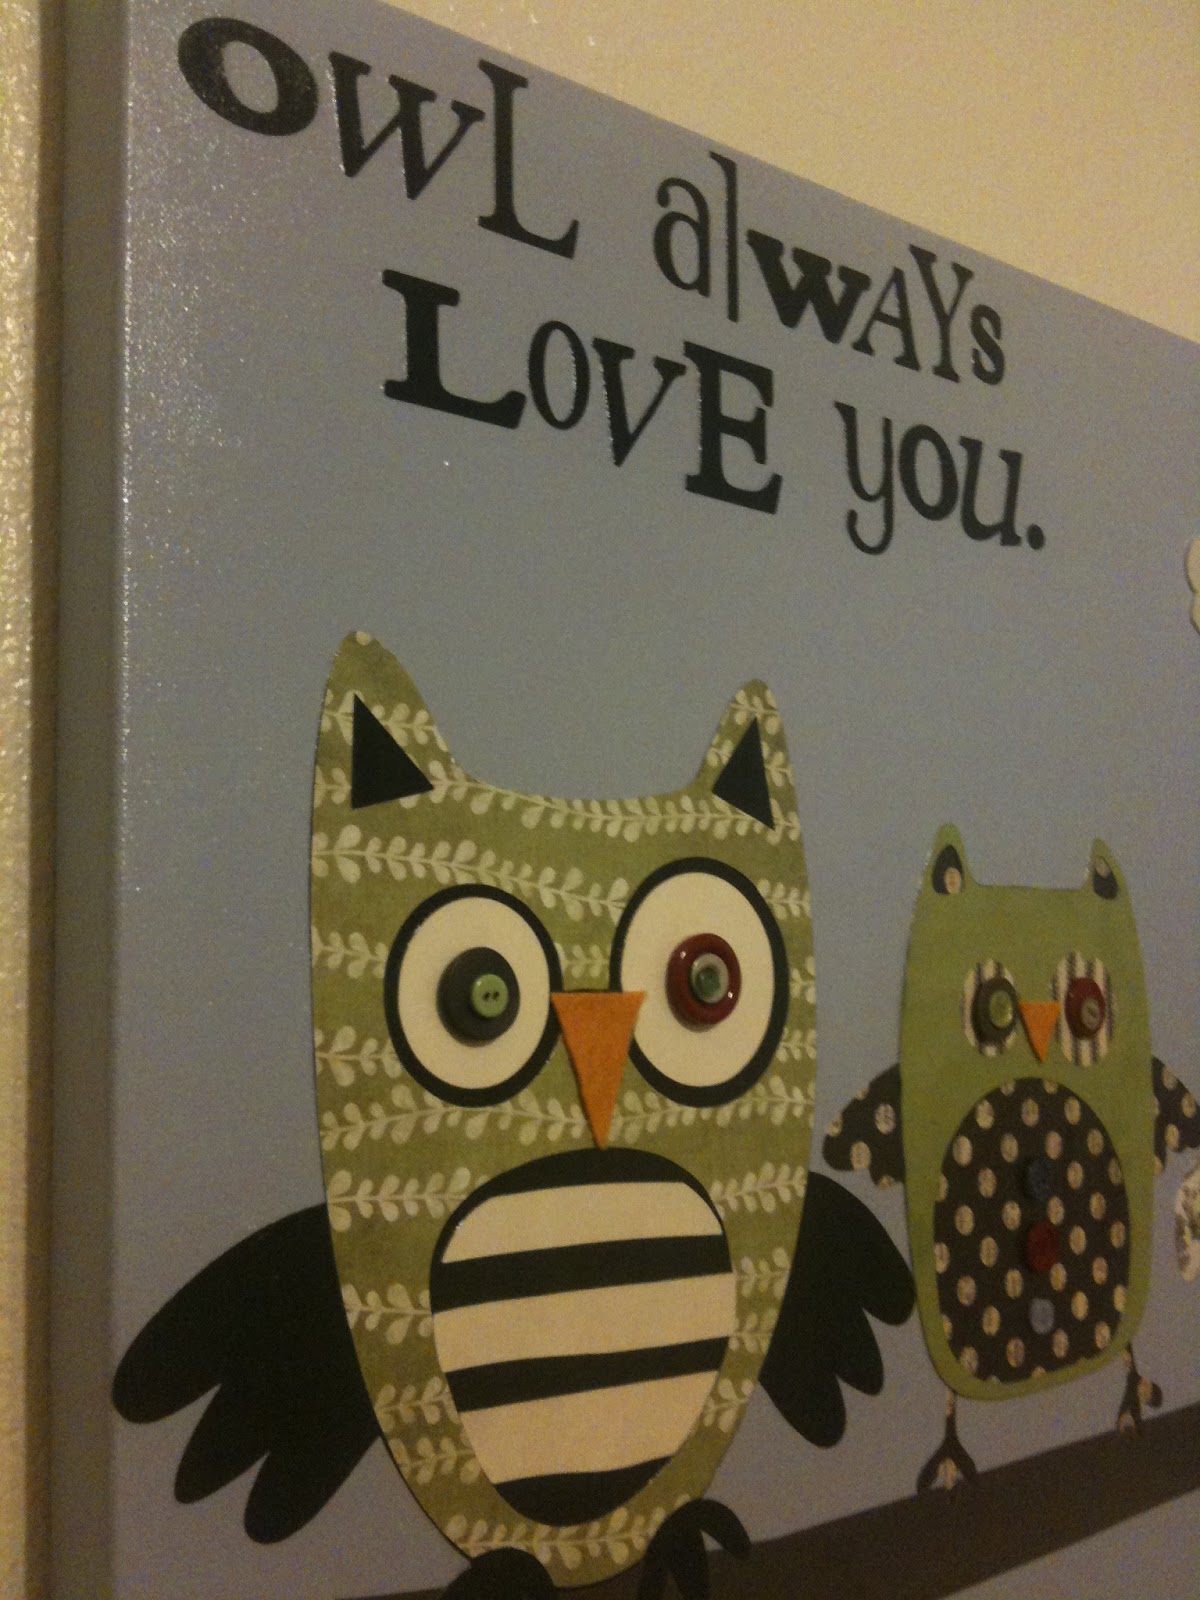
I had set on the theme of owls, they seem to be all the rage right now.  The colors of Zane's nursery are black, cream, and an apple green.  I didn't want the traditional blues or browns. And when it came to this piece of art, I decided the only way I was going to get what I wanted was to make it myself!  And that terrified me because I am my own worst critic!

Luckily for me, my mother-in-law and sister-in-law recently bought a Cricut.  This nifty little machine cuts out all sorts of designs, animals, letters, you name it!  I headed over to Hobby Lobby and bought several sheets of scrapbooking paper, felt, a large blank canvas (all on sale I might add) and some Mod Podge.  

My sister-in-law and I met at my house and got to work! First up - the owls!  She bought a cartridge that had many to choose from and I would pick the paper I thought would make the cutest owls.  That took some trial and error but we finally got it right!  Over the next couple days I sat at the dining room table experimenting with fonts and their size and all the little "extras" that would go on my creation.  I decided this canvas could not stay white since the wall was a light cream color.  I chose a light blue/grey color and got that sucker painted! (Ok...my hubby got that sucker painted).  After I got all the owls and extras cut out along with the letters I went to decoupaging everything on my painted canvas.  I also wanted a little depth and dimension to my work of art so I opted for button eyes on the owls and felt beaks and clouds.  All this combined I thought would give me the quirkiness I envisioned!  See what you think??


Friday, March 11, 2011

Nursery Project

One more nursery project down! 
I finally ordered Zane's mobile for his nursery.  It goes with his bedding and I just love the colors, what I didn't love was the danglies that came on the mobile:


Be my guest as to what those are supposed to be??  I did not think they looked "baby" nor could I decipher what in the world these things were, so I wanted to add my own touch of course!
I got to shopping on, that's right you guessed it, Etsy!  Since I am incorporating owls into his nursery I had the perfect thing in mind!  I found a wonderful page called Purty Bird, they didn't have the exact colors I wanted so I contacted the seller and asked for a custom order. In no time at all she had created just what I wanted.


It's hard to see here, but the stitching is that light green as is in the bedding.

So all I had to do now is get that mobile ordered and get to work!  I bought some loops at Hobby Lobby to thread through the plush danglies and attach to the mobile.


Then I was going to remove those random danglies and use the already sewn on ribbon and loop it through those hoops!  I originally bought some permanent fabric glue to adhere the ribbon to itself.  However, that didn't work so my hubby came to the rescue and got out a needle and thread (I don't sew) and sewed the ribbon together!  What a guy!!

I have to say it looks pretty cute!!!!  I am very pleased with how it looks! 


I hope Zane likes it as much as we do!

Thursday, March 3, 2011

Nursery D.I.Y. - Plus a Sneak Peek!

Baby Zane's arrival date is quickly approaching, so I have been working away to getting his room ready!  The hard part is FINALLY over!!  Meaning the walls are painted and the centerpiece on the main wall is done!  Hallelujah!!  So here is what I envisioned:

Stripes!

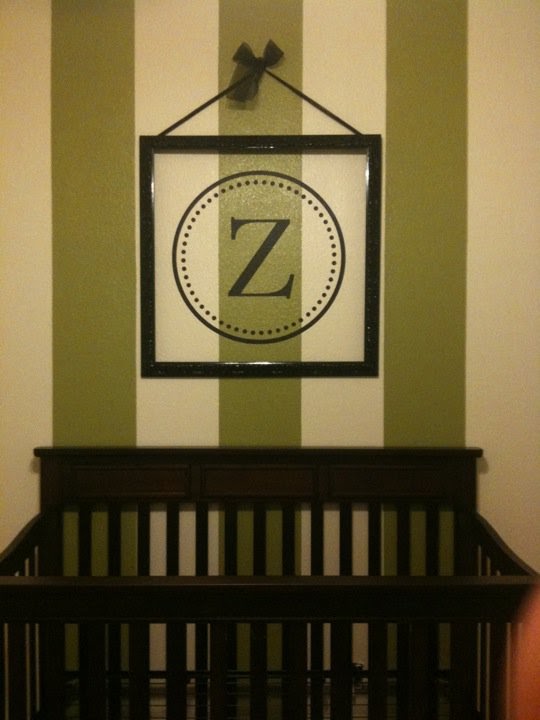
 I wanted to create something fun, so I decided stripes would look great since there are stripes in the bedding too!  First we painted the entire room the cream color you see.  Next, thanks to my ever so handy, construction savvy dad, he measured and drew out the stripes in no time flat!  Then we taped it off and went to work!


Here it is all painted!  There were some areas that needed some touching up, so I got started straightening those lines up!  Talk about teadious work, especially with my very keen eyesight and perfectionist nature!

What I envisioned next was a wall vinyl with his initial, Z.  I wanted something classy yet not feminine, so off to Etsy I went on a mission to find the perfect decal!  Done!

Not just that, it needed a little something extra so I decided an open black frame would do just the trick!  So I headed to my local Hobby Lobby in search for the perfect frame!  It had to be big and it had to be perfectly square and also detailed to bring some elegance.  As luck would have it, I found it!  It was exactly what I wanted and there was only 1 left, not to mention 66% off!!  What a steal!!! 

On the agenda next was to hang these fabulous finds and they have to be perfectly straight, again there's that perfectionist in me!  My dearest hubby thought he was up to the task to please his hormonal and picky wife.  I have to say he did great! 


He very kindly painted the frame solid black and I looped some ribbon through to hang it by, and also giving it some extra cuteness!!  Here he is holding it for me so I could determine how high it needed to be and if it was centered etc.

Next came strategically placing the decal, again perfectly in the center.

Ready for adhesion!!!


Voila!!!

 
 View walking in
 
Ok, as if that weren't enough, I wanted to replace the knob pulls on the dresser/changer.  The ones that came on it were rather plain and I wanted something more. 

Before:
(Ignore the random accessories)

 
So again, off to the trusty Hobby Lobby! I found some that were the right colors of the nursery and striped, and also 50% off! What luck!!  

This picture does not do them much justice, but in person it looks GREAT!!!!

And closer up....


My projects are completed for now, I have another on the way and I will let you in on that fun activity soon!  Hope you enjoyed my project adventure and the sneak peek into Zane's domain!